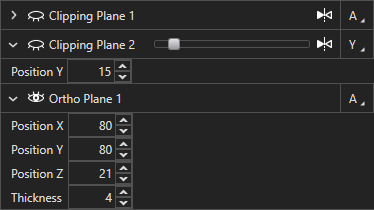
Using clipping and ortho planes
To add a clipping plane, click on the Add Clipping Plane icon  in the table header. The clipping plane is added to the display with portions of the scene clipped away (see right, click to enlarge).
To add an ortho plane, click on the Add Ortho Plane icon  .
.
Adjust plane position
If the Plane Orientation of the clipping/ortho plane is set as X, Y, or Z, the position of the clipping/ortho plane can be adjusted using the on-view Basic Widget, slider in the plane's table row, or Position textbox in the expanded plane options.
If the Plane Orientation of the clipping/ortho plane is set as Advanced, the position of the clipping/ortho plane can be adjusted using the on-view Advanced Widget or Position textboxes in the expanded plane options. There is no slider in the plane's table row when the Plane Orientation is Advanced.
Ortho-plane thickness can be adjusted using the Thickness textbox in the expanded plane options.

Toggle mesh and volume clipping
You can toggle clipping of the displayed channel, objects, or both by clicking on the Volume icon  and/or Mesh icon
  in the table row of the clipping/ortho plane. A comparison of the clipping modes is shown below:
| | |
| Volume clipping only (objects off) | Mesh clipping only | Volume and mesh clipping |
You can specify the clipping mode for each clipping/ortho plane independently to customize the display of the clipped scene in 3D View.