How to edit outlines
- Hoyin Lai
Outlines are the objects that are generated from applying a recipe for 2D/2D+time processing. The Outline Editor in Aivia allows you to edit the object outlines. You can add or remove outlines by drawing on the image and project the drawn regions across a time-series.
The Outline Editor is found in the Contents Panel at the bottom of the Aivia Window.
The workflow for editing outlines can be summarized as follows:
- Optional - Select an object set
- Draw regions
- Select an edit action for the drawn regions
- Repeat 2 and 3
In Aivia, outline edits are applied once you select an edit action. This will automatically update object measurements, and if editing on tracks, the track associations.
Select an object set
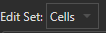
If you have more than one object set on the image, click on the dropdown menu under Edit set to specify the object set you wish to edit.
If your image has no existing object outlines, you will be prompted to insert an object set prior to editing.
On this page:
Draw regions
To edit an outline, you will need to draw regions on the image and specify the desired interaction (add or remove). Edits are made directly on the image using the drawing tools provided. There are six (6) drawing options:
| Drawing Tool | Icon | Descripton |
|---|---|---|
| Freehand region |
| Creates a free-form region from tracing the mouse cursor location |
| Polygon |
| Creates a polygon region with vertices specified by clicking on the image |
| Square |
| Creates a small square region |
| Boundary-guided line |
| Creates a free-form region, snapping to the contours on the image |
| Line |
| Creates a straight line between user-specified vertices |
| Circle |
| Creates a small circular region |


Freehand regions
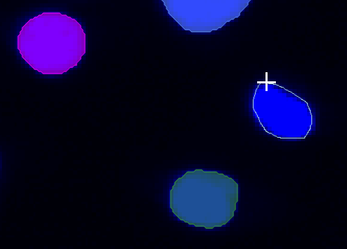
Click on one of the drawing tools in the section to select a tool. By default, the Freehand region tool is selected, allowing you to make edits right a way. When you hover over the image, a crosshair cursor replaces the normal mouse cursor.
With the freehand region tool, hold down the left mouse key while dragging the mouse cursor to trace around the region you wish to edit. When you release the mouse, the editor will automatically enclose the region you have drawn.
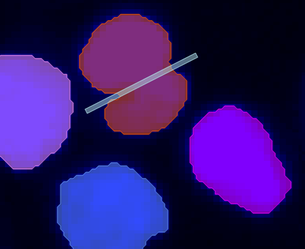
Lines and polygons
The line and polygon tools use a slightly different method for specifying the region to edit. To specify a starting point, move your cursor over the image to the desired area and click once with the left mouse button.
Click again with the left mouse button to terminate the line or specify the location of a new vertex in the polygon. Double-click on the image to complete the polygon.
The drawn region will appear in the action table and is indicated on the image with a bounding box.
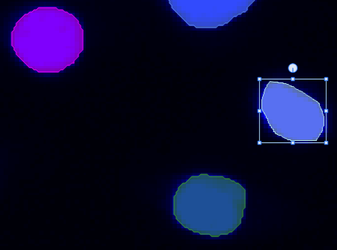
Modify drawn region
You can resize the region by holding down on the left mouse button when your cursor is on one of the eight anchors on the bounding box. To rotate the region, move your cursor to the large circular anchor above the bounding box and hold down the left mouse button and move your mouse. To move the region, hold down the left mouse button while your cursor is over the selected drawn region and drag.
The cursor will change appearance when you hover over any of the anchors.
Copy regions
You can copy the drawn regions to different time frames in the Copy Drawn Shapes section.
The Copy Selected button copies the selected drawn region to other time frames; the Copy All button copies all regions drawn on the image to other time frames. You can specify to copy the regions only to the next time frame using the Next Frame option, or to the entire time series using the All Frames option.
The copied regions will appear only in the "Drawn" state on the other frame(s) regardless of the actions that are taken on the current frame.
You can also copy selected regions by pressing Ctrl + C on your keyboard. To paste the selected region, press Ctrl + V on your keyboard.
Select edit actions
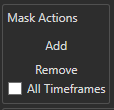
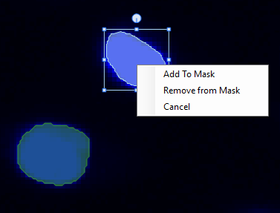
Once you have drawn and selected a region, you can specify the edit actions to be made in the Mask Actions section in the Mask Editor. Alternatively, you can right-click on the drawn region to display the edit context menu on the image.
- The Add function will add the drawn region to the image as an outline. If the added region overlaps with an existing outline, the add function will merge the drawn region and the existing outline to create a new outline object based on the combined boundary of both.
- The Remove function will subtract the drawn region from an existing outline and update the outlines. If the removed region crosses the entire object, this will split the existing outline object and create new outline objects.
- In the edit context menu, the Cancel function allows you to delete the drawn region - no edit actions will be taken when cancel is selected.
The actions taken on the selected drawn regions are recorded in the Action table. If the user selects cancel on a drawn region, it will be removed from the list.
Apply edit to all frames
If the objects are relatively stable in shape and position throughout the time-lapse, you can expedite the editing process by projecting your edits across all frames.
In the Mask Actions section, click on the All Timeframes checkbox to apply the mask action (Add or Remove) to all time frames.
Undo and redo
You can undo and redo an action in the Track Editor by pressing the following key combinations:
- Undo:
Ctrl+Z - Redo:
Ctrl+Y
There is no limit to the number of undo actions. The redo actions will be cleared if the user performs a modification that is not an undo action.