Define large
data and fast cache folders
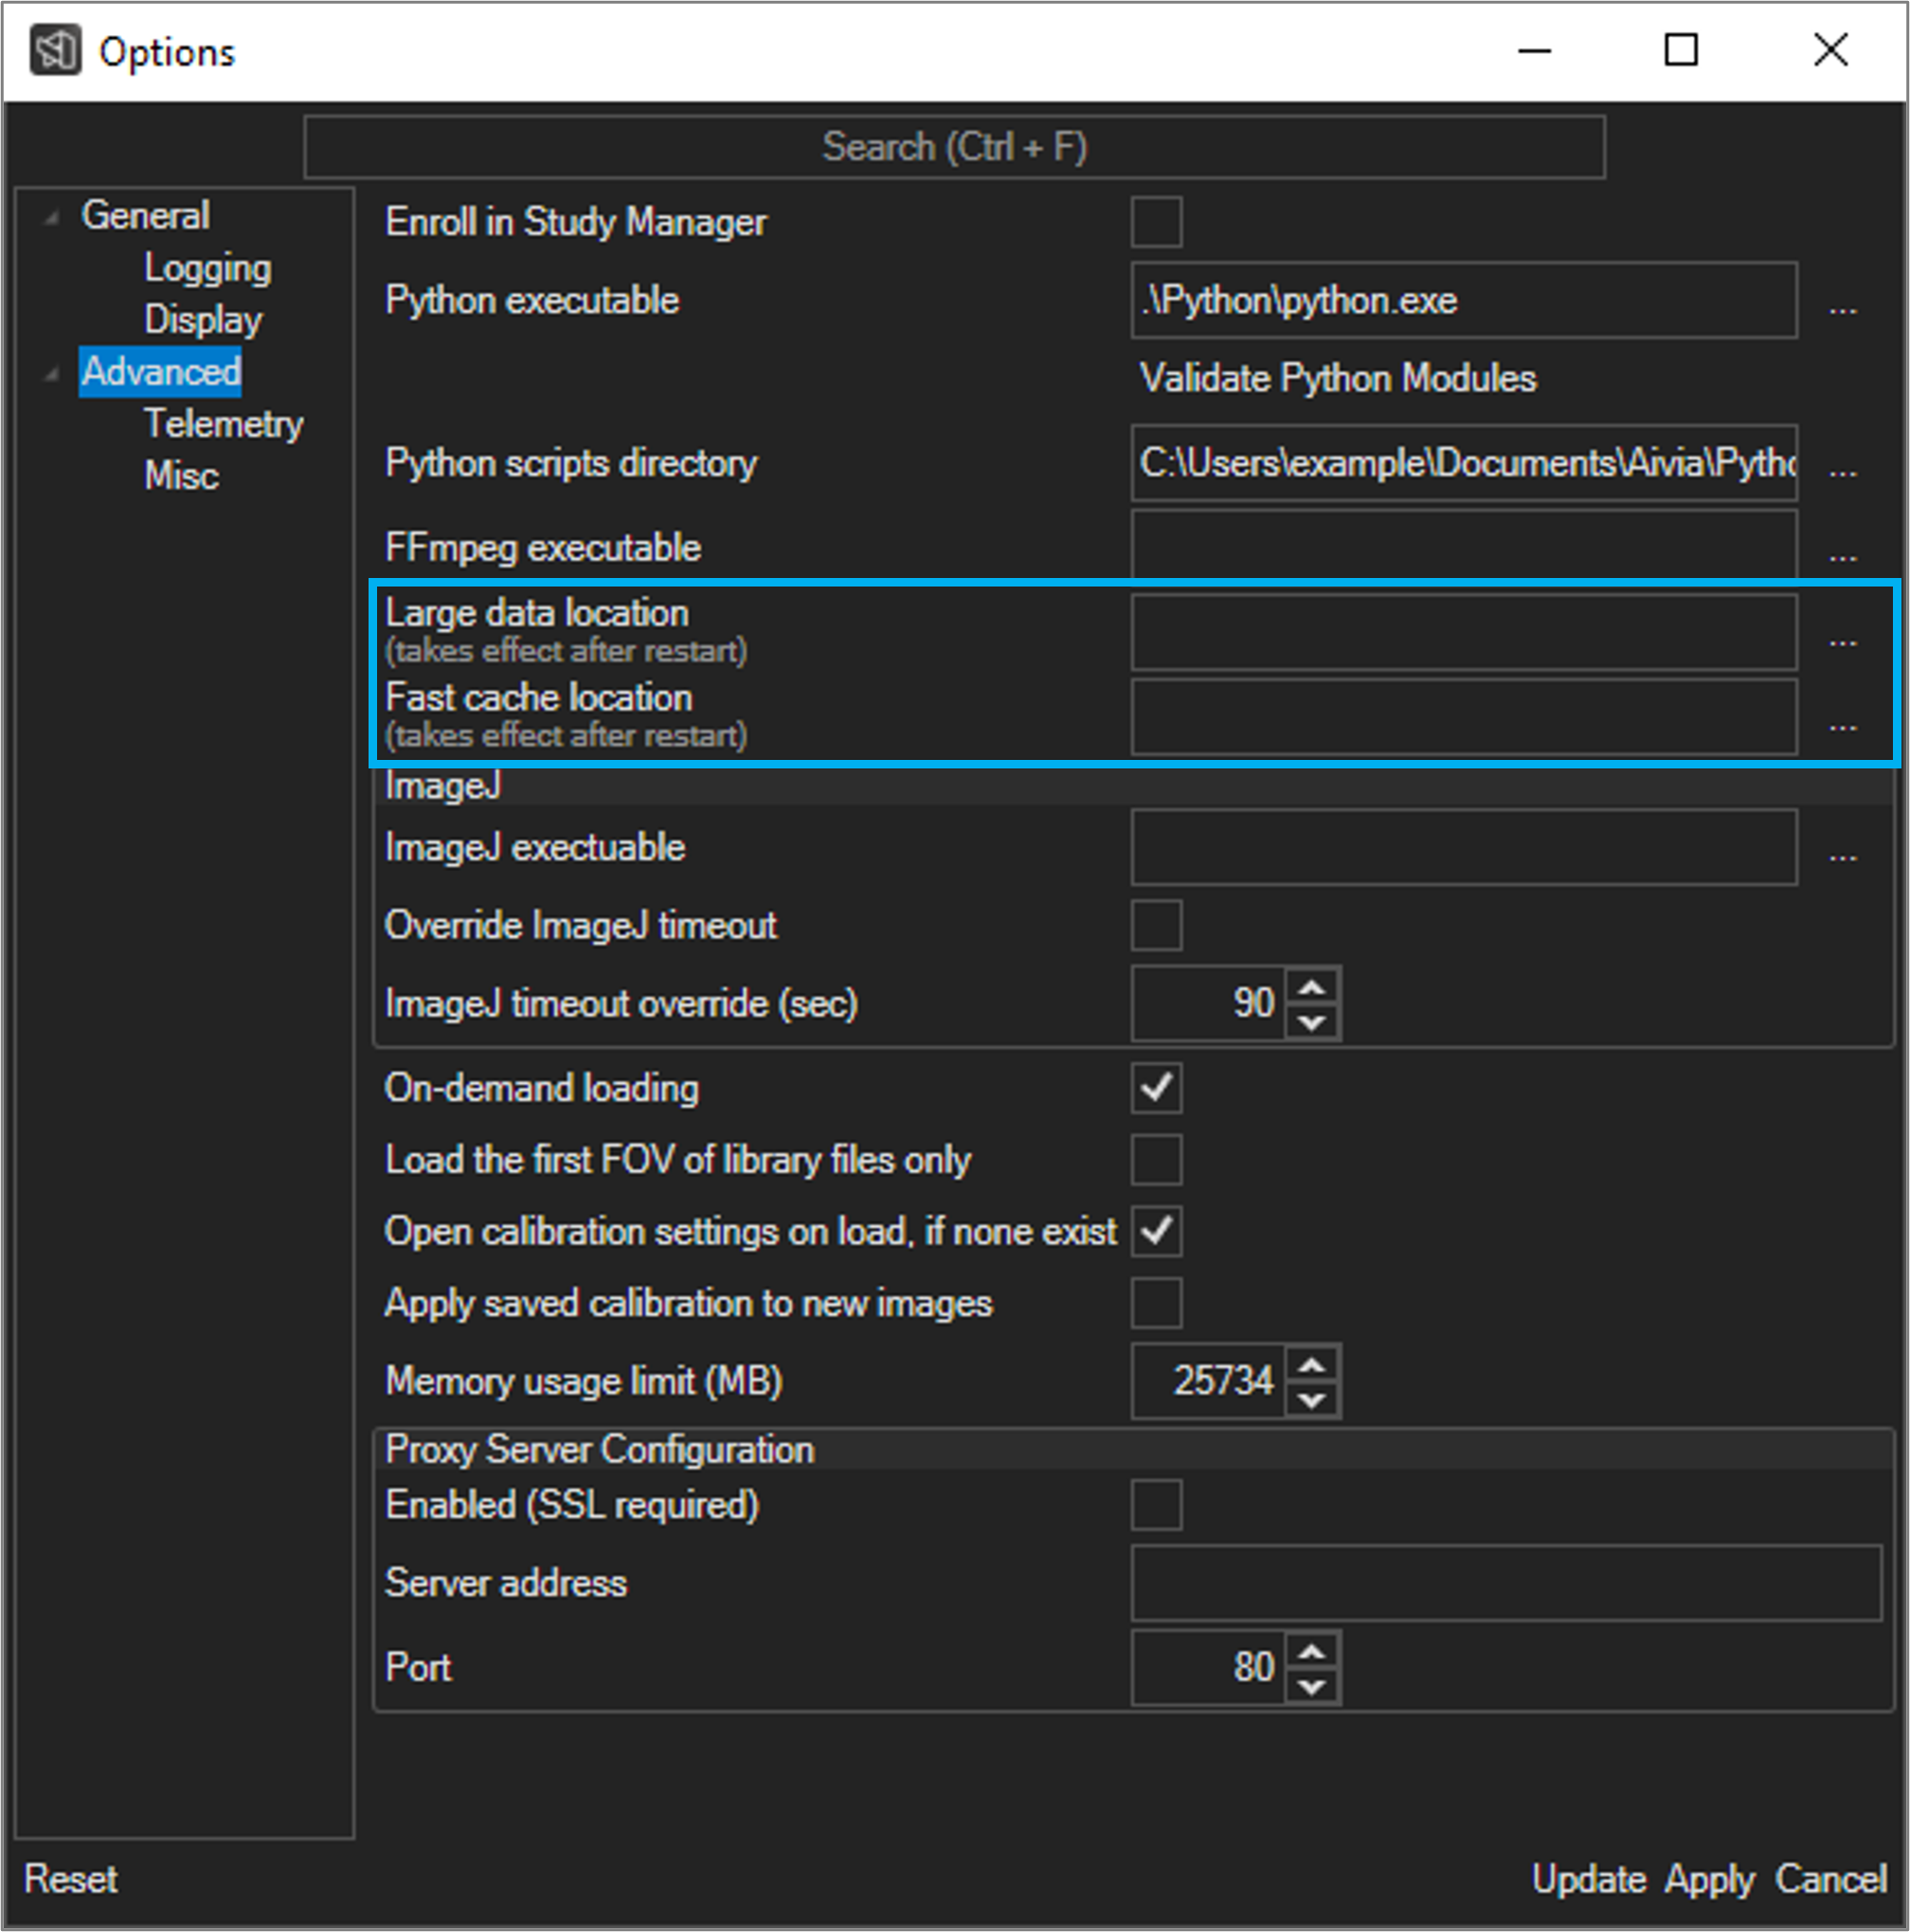
When working with datasets that are larger than the amount of memory (RAM) available on the computer, Aivia
loads and pre-
caches image data on your hard drive
(s) in the large data and fast cache working
folders for quick retrieval. The data
caches are emptied when
Aivia is exited.
Go
to File > Options... to launch the Options dialog.
Click Advanced in the left section of the Options dialog.
Click on the ... button to the right of the directory path field for the Large Data Location.
Select a folder location with ample free disk space
in the pop-up dialog; we recommend using a high-capacity solid-state drive (SSD) connected locally if possible. By default, the large data working folder can be found in %appdata%\
Leica Microsystems\Aivia
version.revision\, where version and revision are the Aivia version and revision numbers respectively.
Click Select Folder to update the file path.
Click on the ... button to the right of the directory path field for the Fast Cache Location.
Select a folder location with fast read and write access in the pop-up dialog; we recommend using a solid-state drive (SSD) connected locally if possible. By default, the fast cache folder can be found in %appdata%\Leica Microsystems\Aivia version.revision\, where version and revision are the Aivia version and revision numbers respectively.
Click Select Folder to update the file path.
To update the settings,
click Apply
at the bottom of the Options window; you must restart Aivia for the settings to take effect.
Define ImageJ executable
Aivia uses BioFormats from ImageJ/FIJI for file types that are not supported natively
. Defining the location of your ImageJ/FIJI executable
allows Aivia to launch ImageJ/FIJI automatically when needed.
Go
to File > Options... to launch the Options dialog
Click Advanced in the left section of the Options dialog.
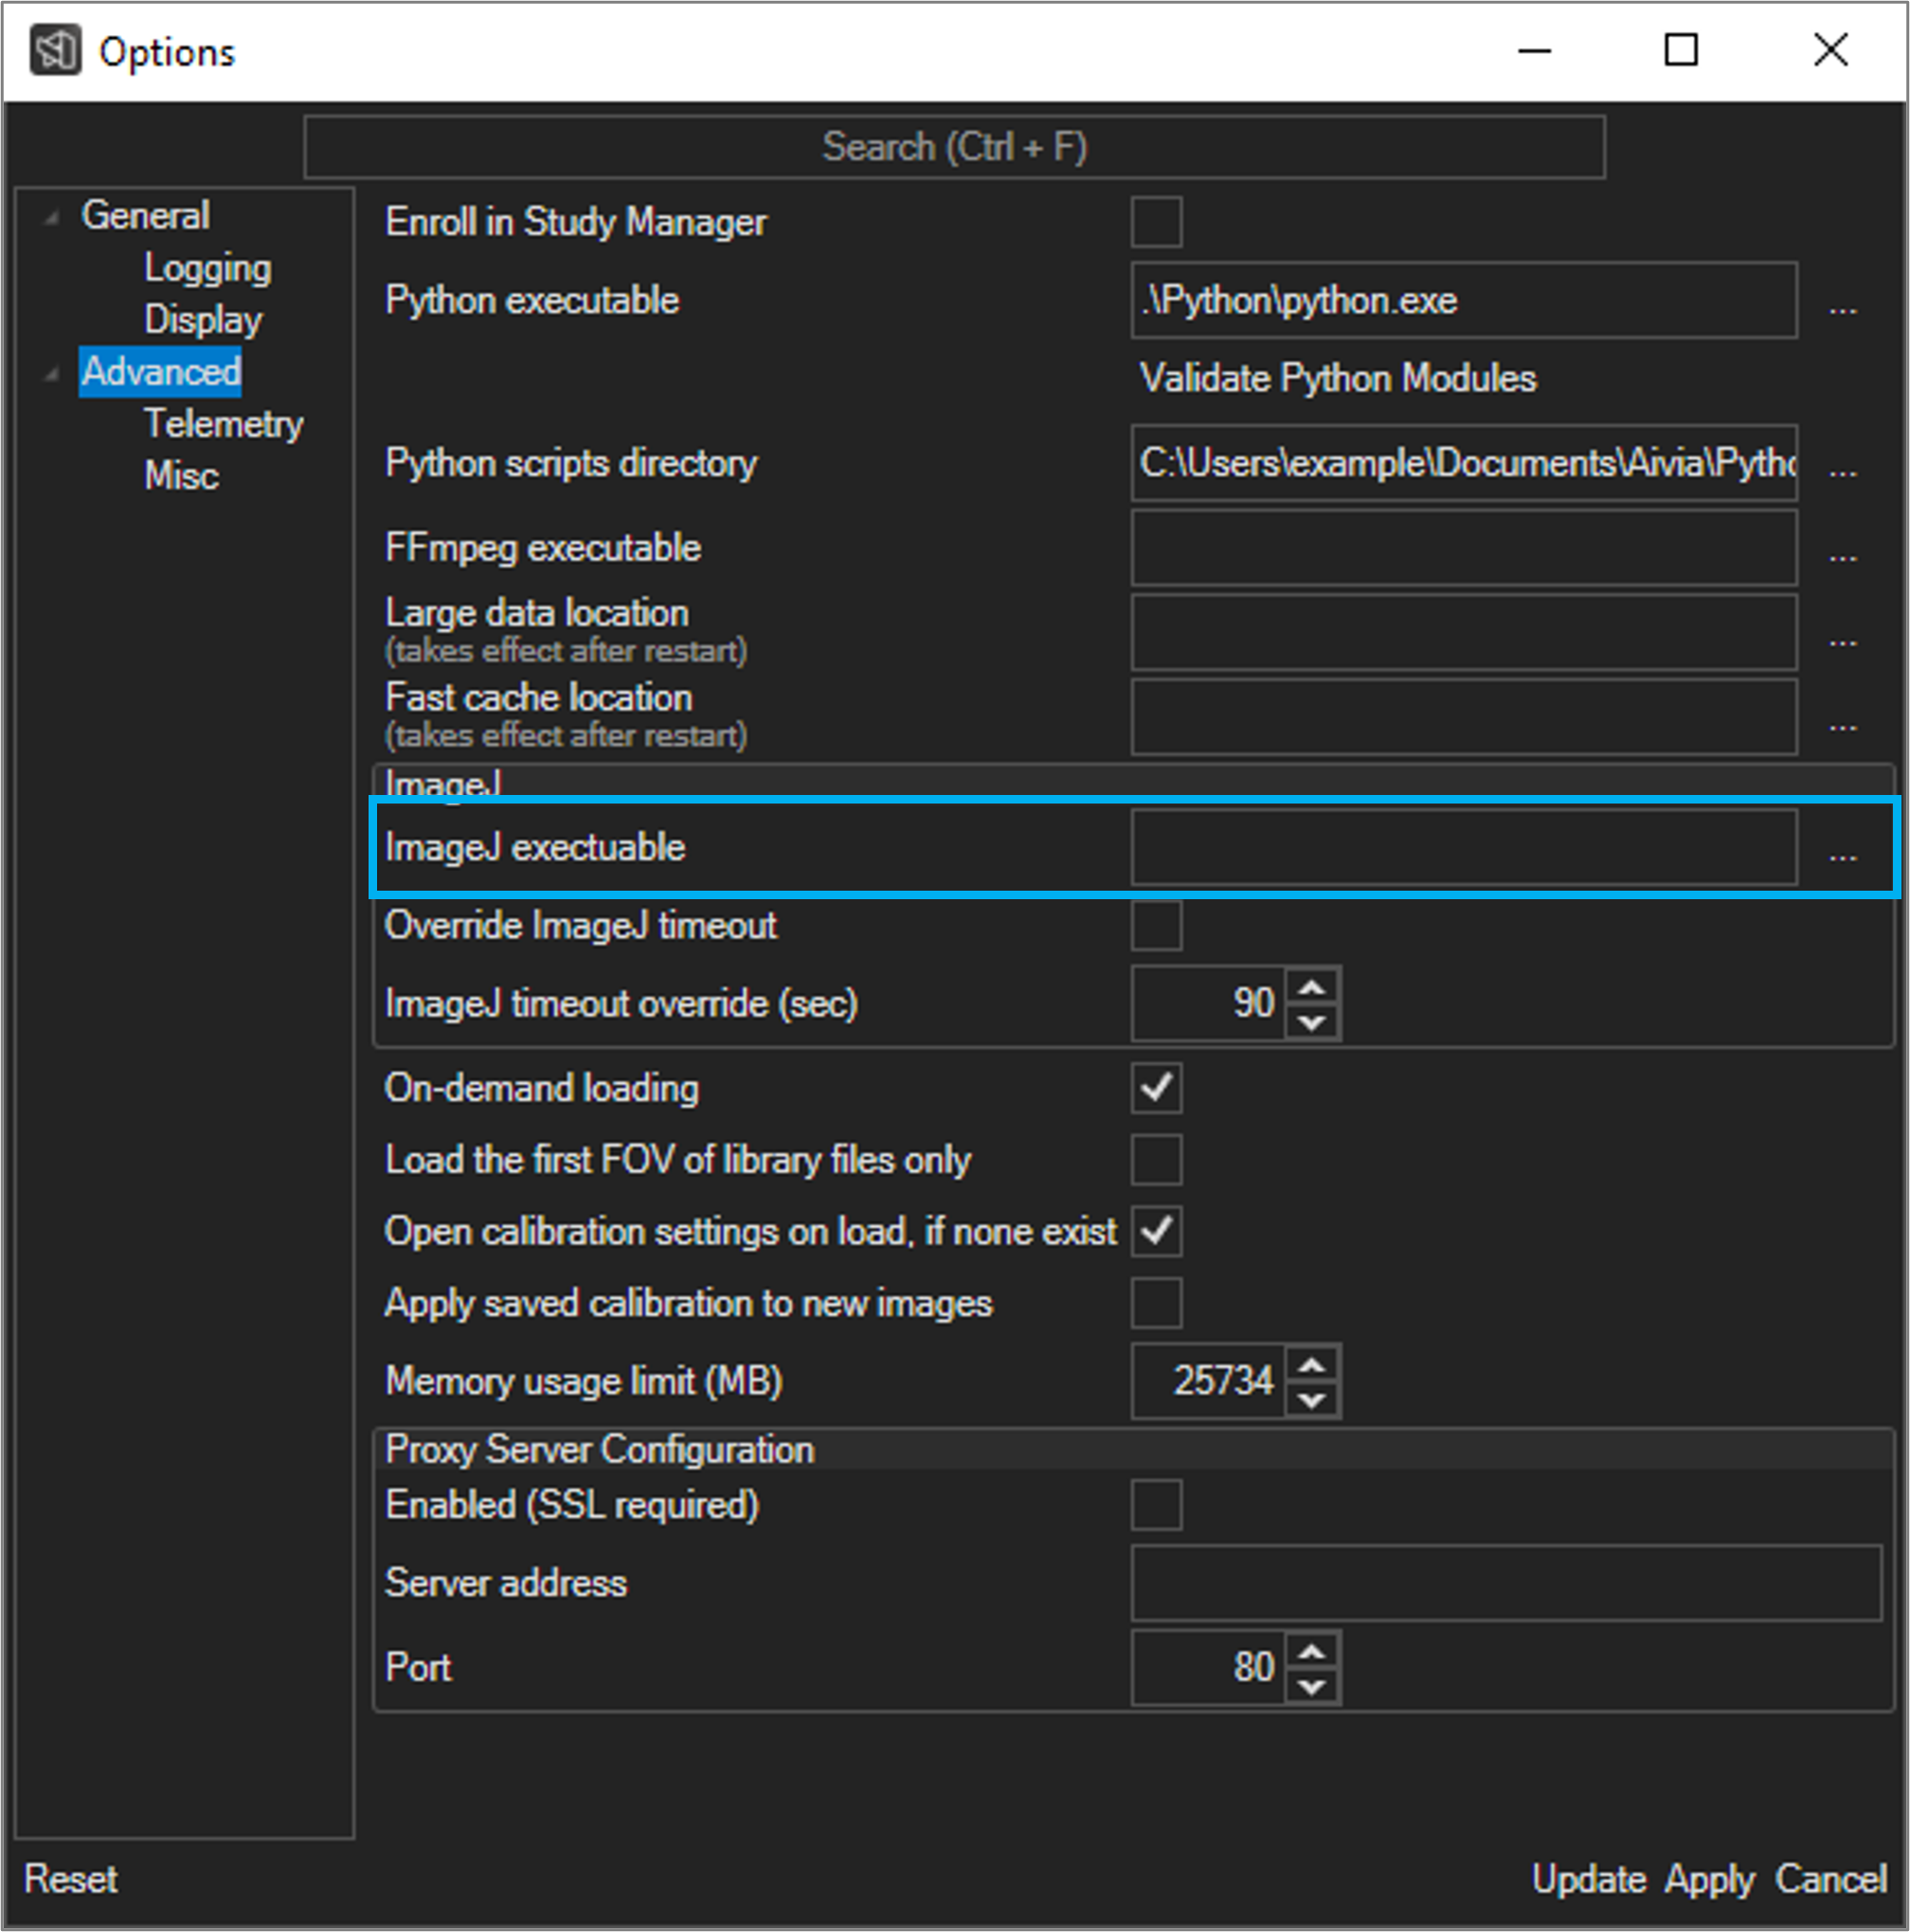
Click on the ... button to the right of the directory path field for the ImageJ Executable.
In the pop-up dialog, navigate to the location of your ImageJ/FIJI program executable. If you have FIJI installed, the executable will typically be located in a folder
called Fiji.app. For better performance, we recommend using a 64-bit installation of ImageJ/FIJI.
Click Open
to define the location of your ImageJ/FIJI installation.
To update the settings,
click Apply
at the bottom of the
Options window; you must restart Aivia for the settings to take effect.
| Info |
|---|
After you |
modify the settings, make sure you restart Aivia in order for the new settings to take effect. |
Opt in or out of sharing user data
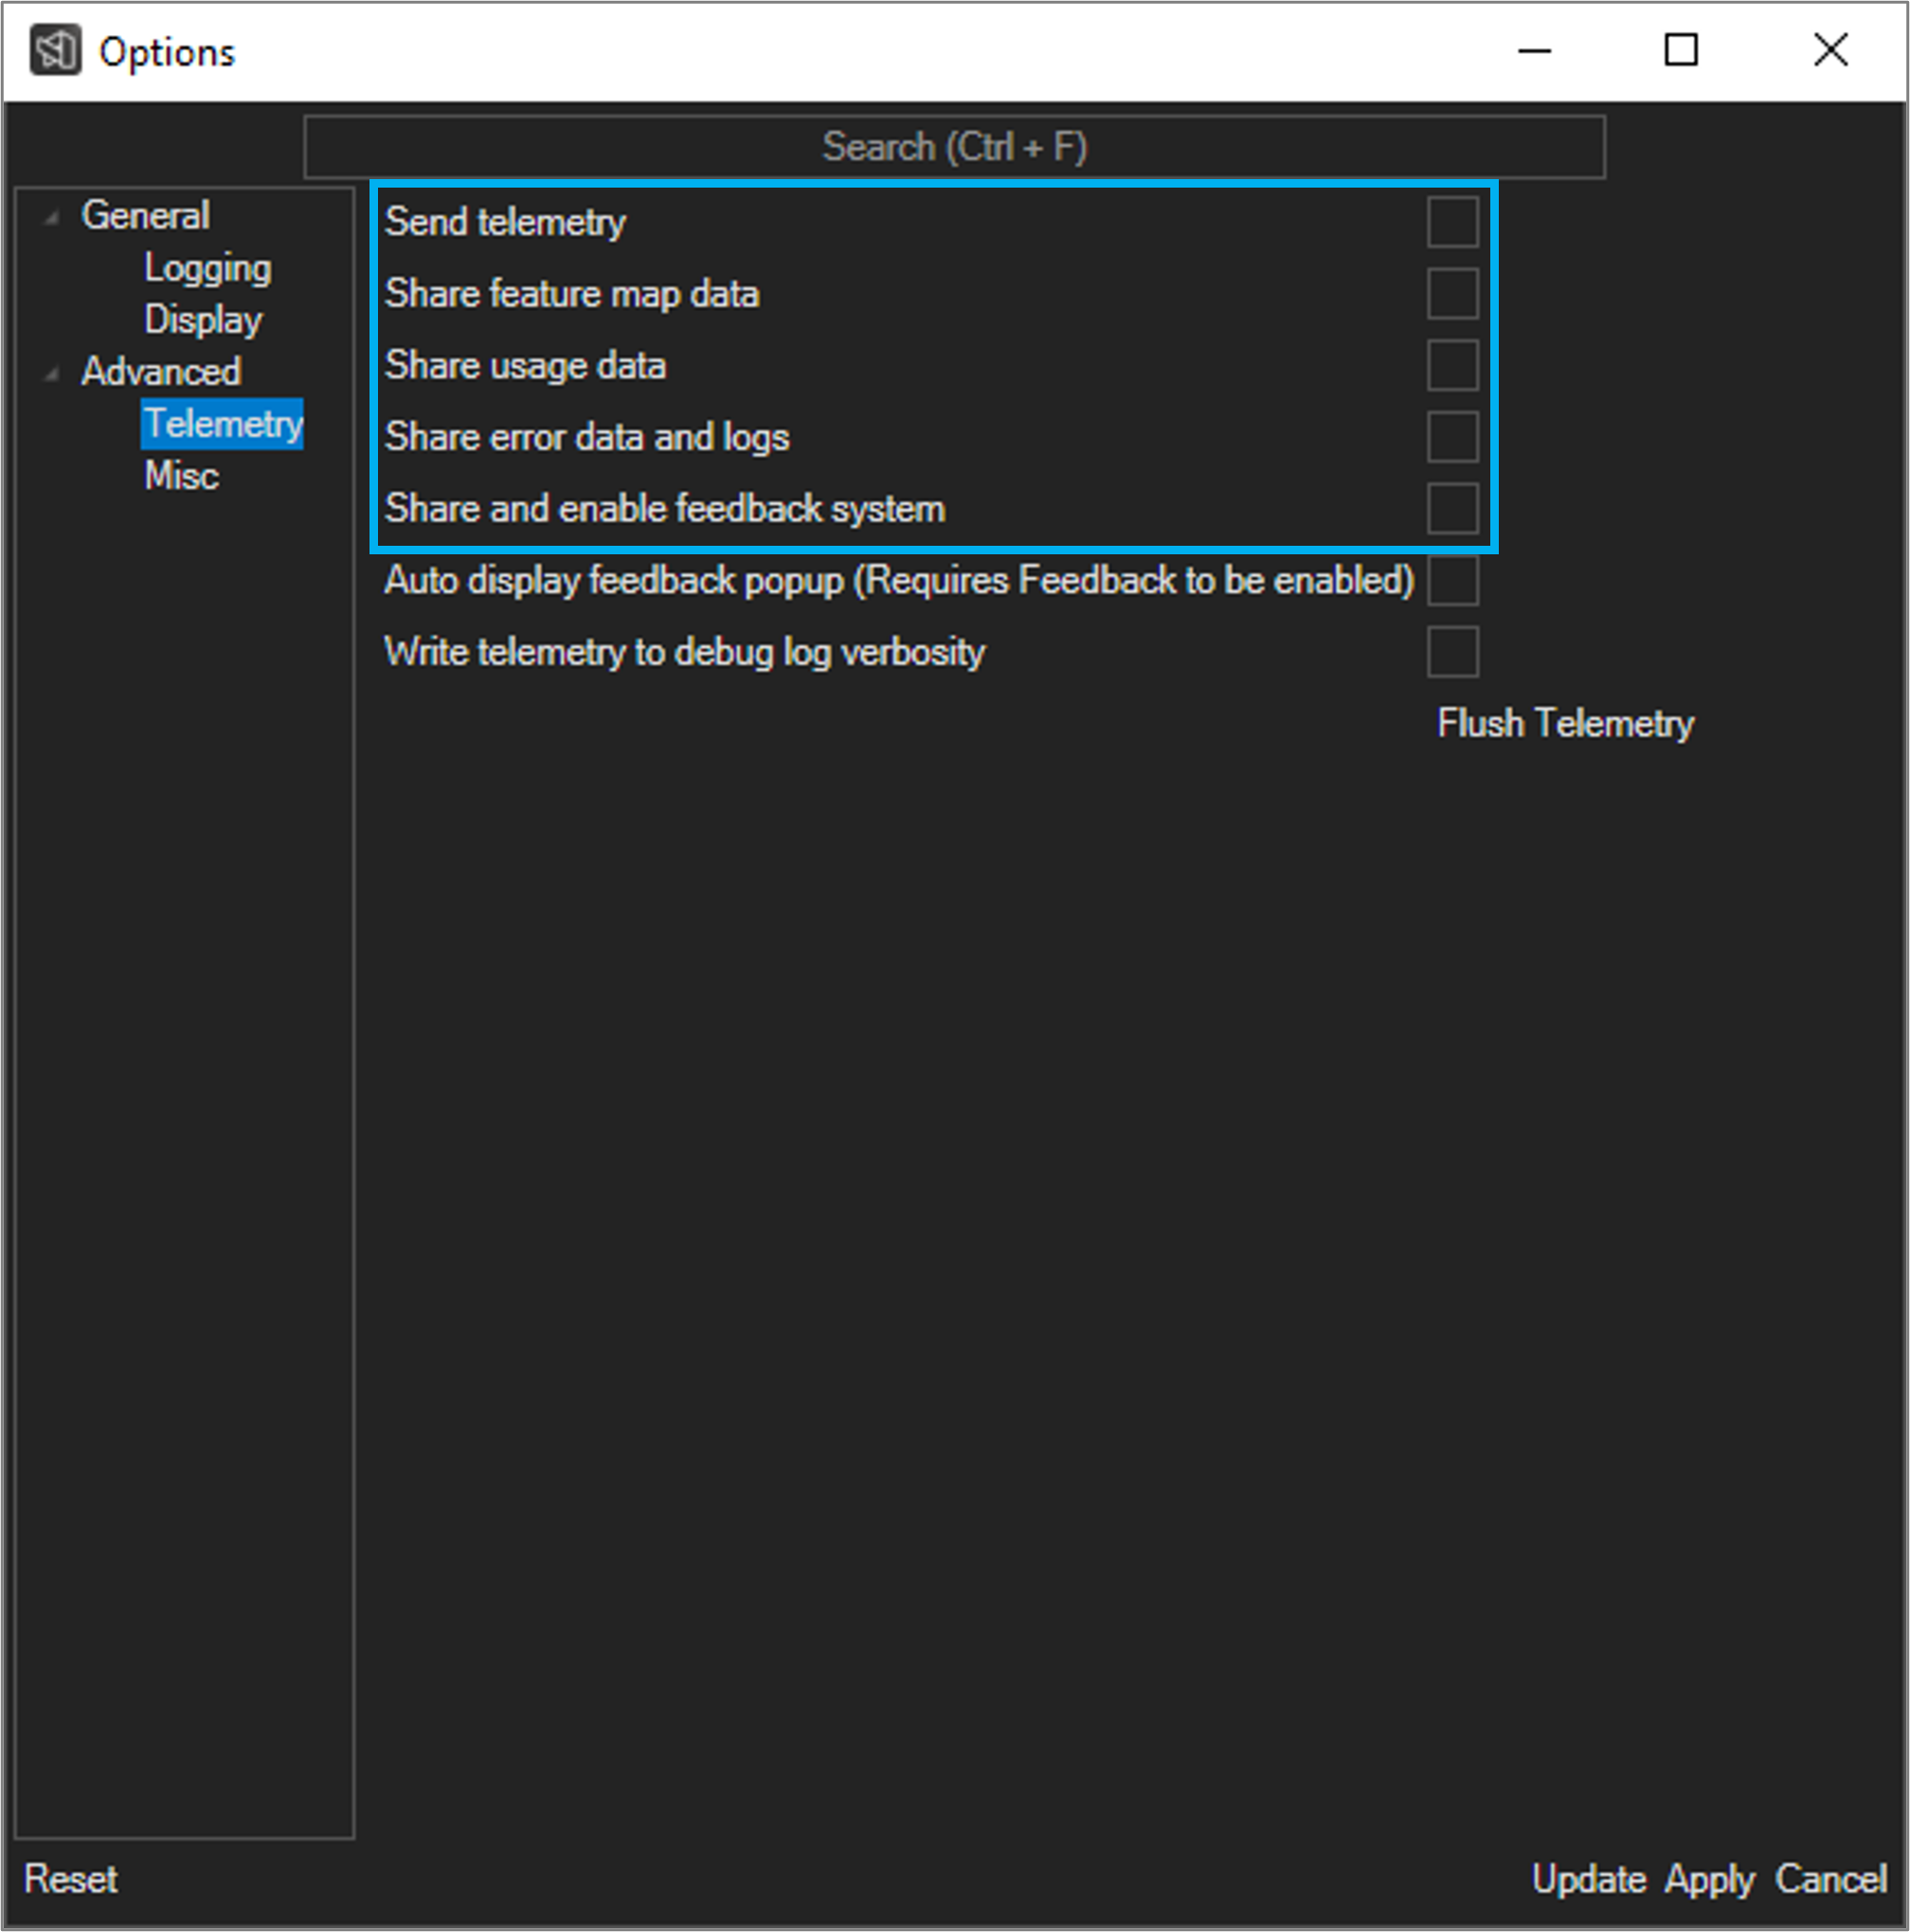
We are constantly working to improve your experience with Aivia, and user data aids us in building new tools and improving existing tools to make your image analysis work faster and easier. During installation, you may opt in to share user data with us. Additionally, you can enable or disable the sharing of user data (telemetry) with the Send Telemetry checkbox in the Telemetry section of the Aivia Options dialog. We do NOT collect your results or raw image data whether or not you share your user data.
Furthermore, you may specify what kind(s) of user data, if any, you would like to share using the four (4) options below the Send Telemetry checkbox:
The Share Feature Map Data option allows sharing of feature maps, which are abstract representations of your raw images. A feature map is a 1D array that is a processed and compressed version of the raw image data.
The Share Usage Data option allows sharing of usage data and other system-related information.
The Share Error Data and Logs option allows sharing of data relating to errors and warnings that occur during Aivia use.
The Share and Enable Feedback System option allows prompts to appear for you to provide feedback about how Aivia did generating results.
| Info |
|---|
If you previously shared your data with us and want us to delete it or you want to get a copy of your data, please contact us via aivia.support [at] leica-microsystems.com. |
Related articles
| Filter by label (Content by label) | ||||||||||
|---|---|---|---|---|---|---|---|---|---|---|
|
|
|
|
|
| Page Properties | ||
|---|---|---|
| ||
|


