Define large
working folderdata and fast cache folders
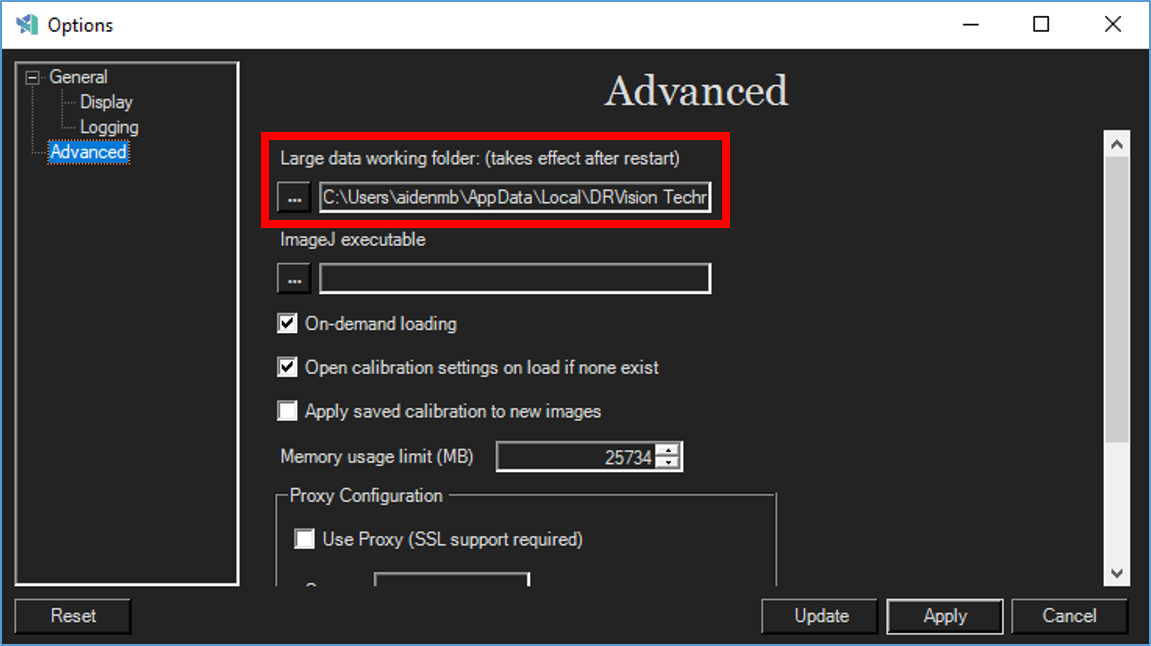
When working with datasets that are larger than the amount of memory (RAM) available on the computer, Aivia will load loads and pre-cache caches image data on your hard drive(s) into the large data and fast cache working folder folders for quick retrieval. The data cache is caches are emptied when exiting Aivia is exited.
- Go to File > Options... to launch the Aivia options Options dialog.Go to
- Click Advanced in the options left section of the Options dialog.
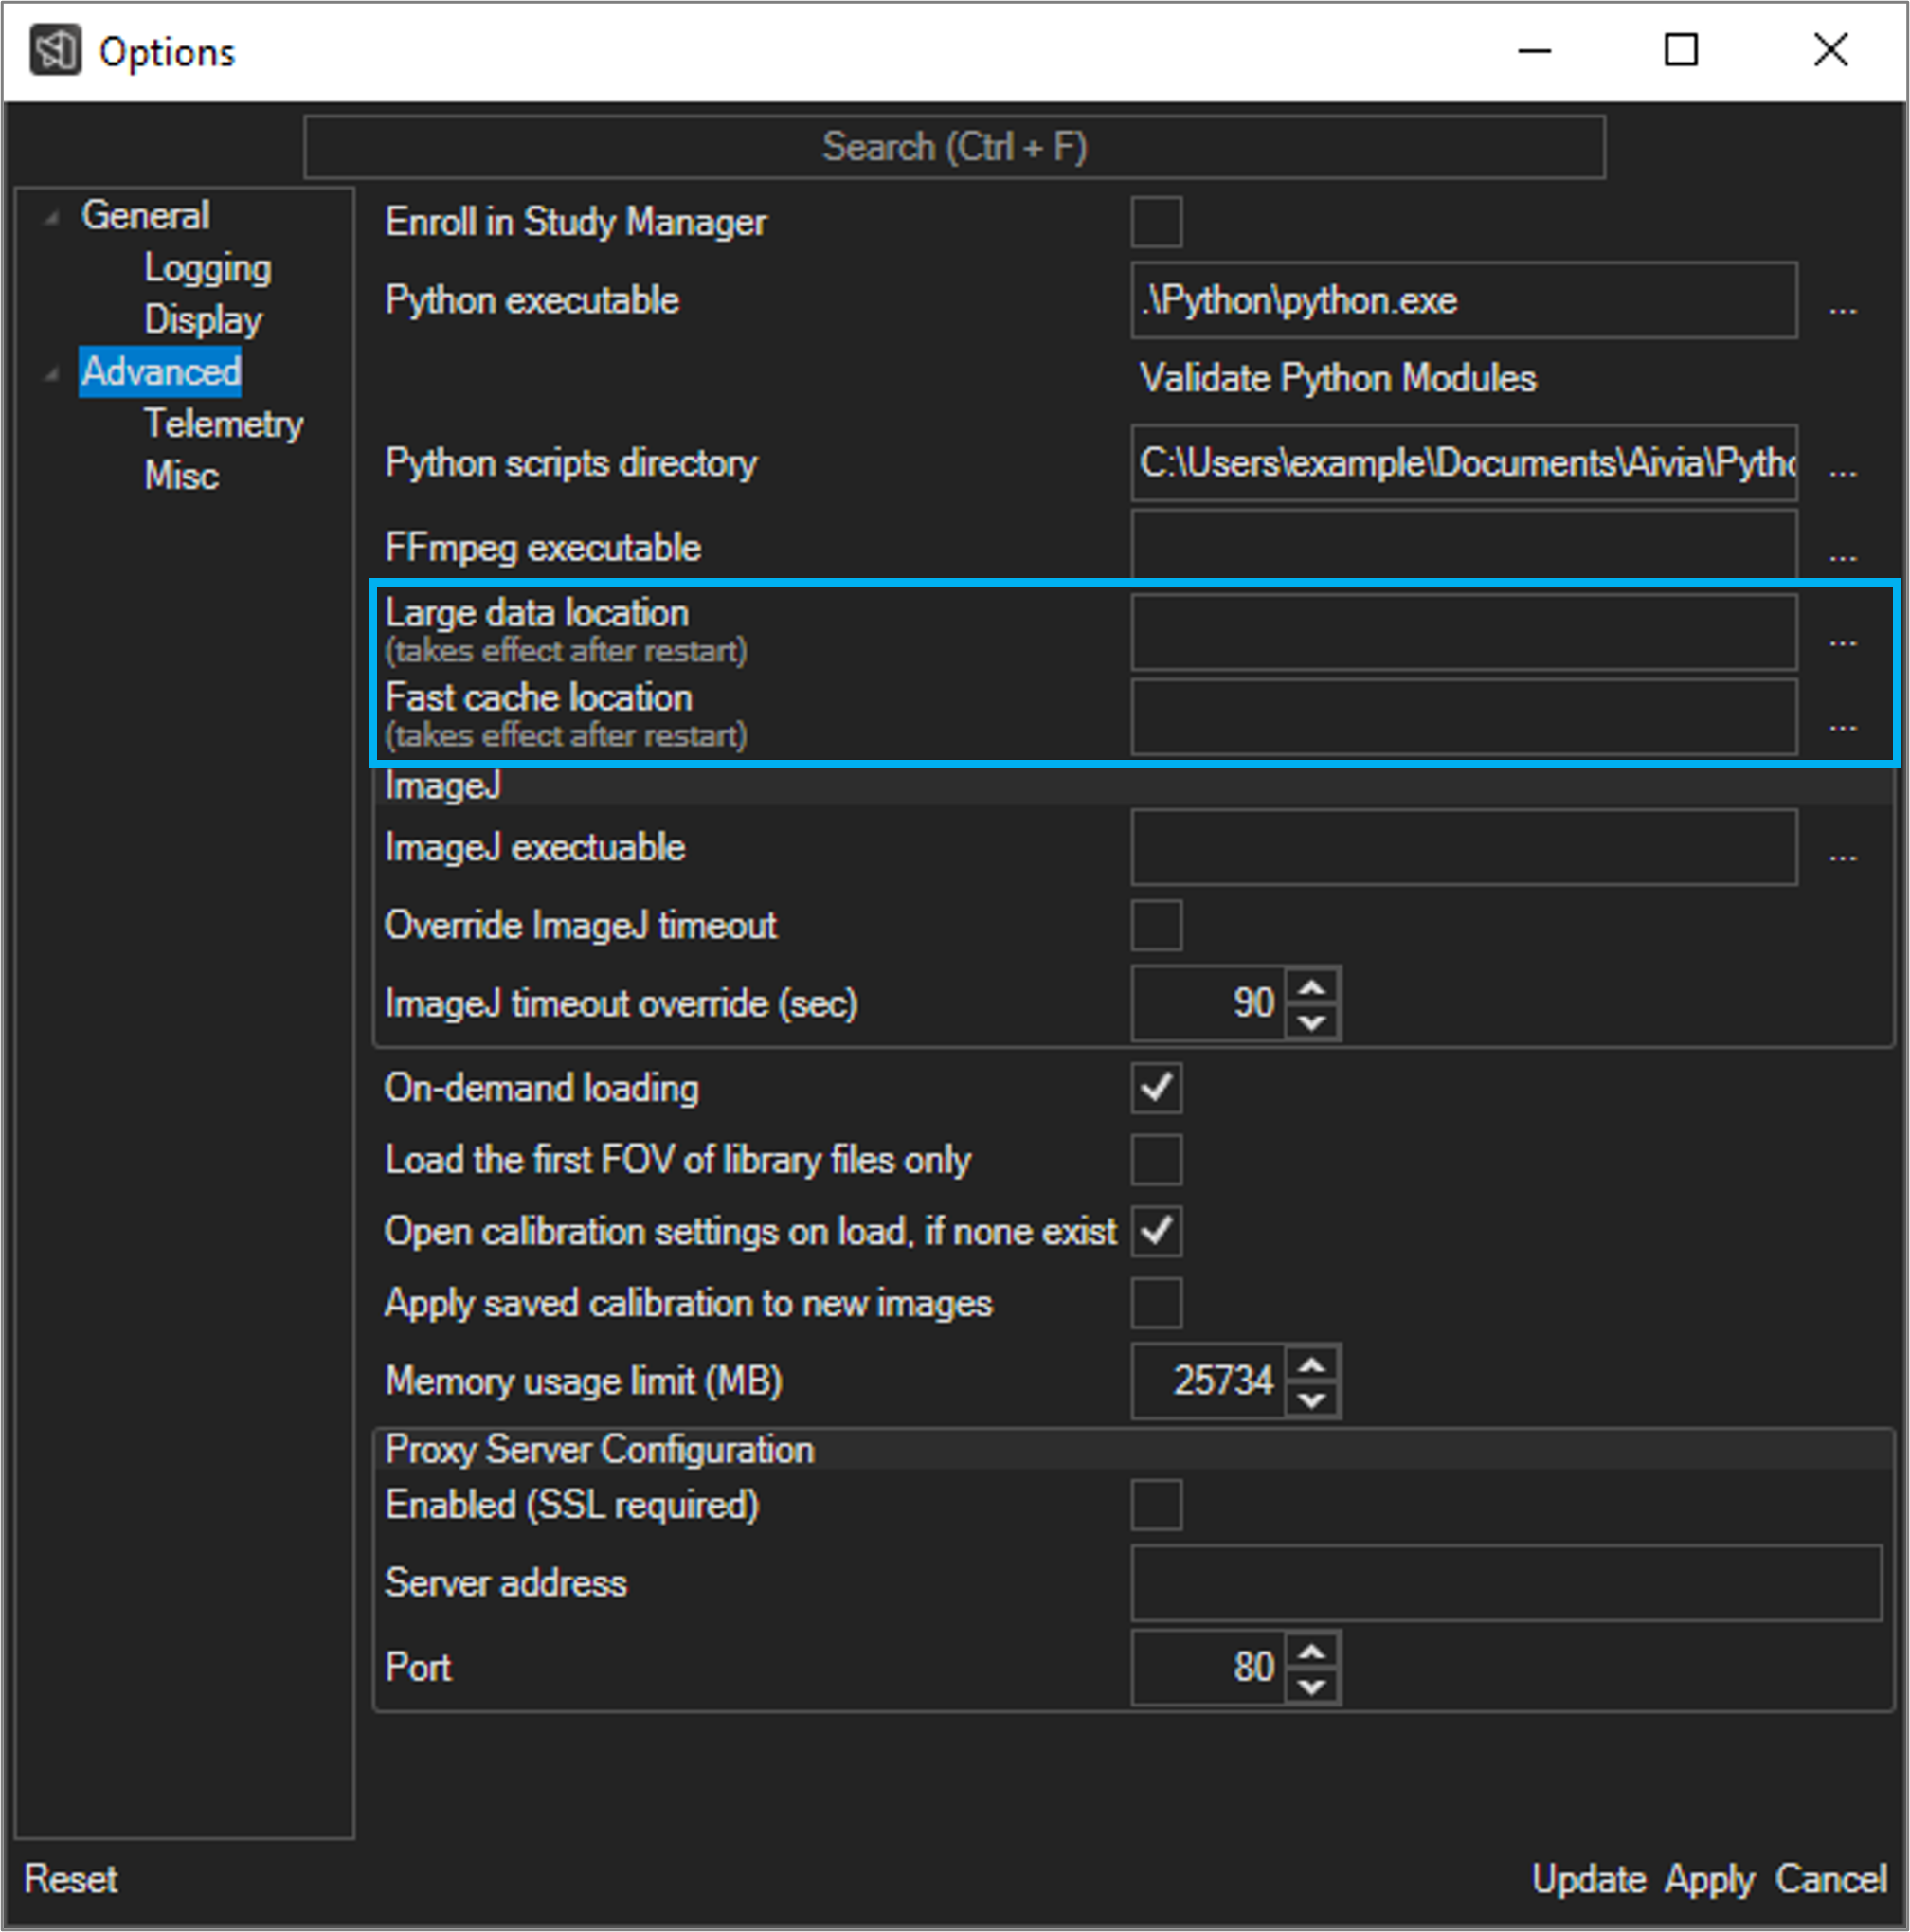
- Click on the ... button to the left right of the directory path below Large data working folderfield for the Large Data Location.
- Select a folder location with ample free disk space and fast access in the pop-up dialog; we recommend using a high-capacity solid-state drive (SSD) connected locally if possible. By default, the large data working folder can be found in %appdata%\DRVision Technologies LLC\Aivia 6\\Leica Microsystems\Aivia version.revision\, where version and revision are the Aivia version and revision numbers respectively.
- Click Select Folder to update the file path.
- Click on the ... button to the right of the directory path field for the Fast Cache Location.
- Select a folder location with fast read and write access in the pop-up dialog; we recommend using a solid-state drive (SSD) connected locally if possible. By default, the fast cache folder can be found in %appdata%\Leica Microsystems\Aivia version.revision\, where version and revision are the Aivia version and revision numbers respectively.
- Click Select Folder to update the file path.
- To update the settings, click Apply at the bottom of the Options window; you must restart Aivia for the settings to take effect.
Define ImageJ executable
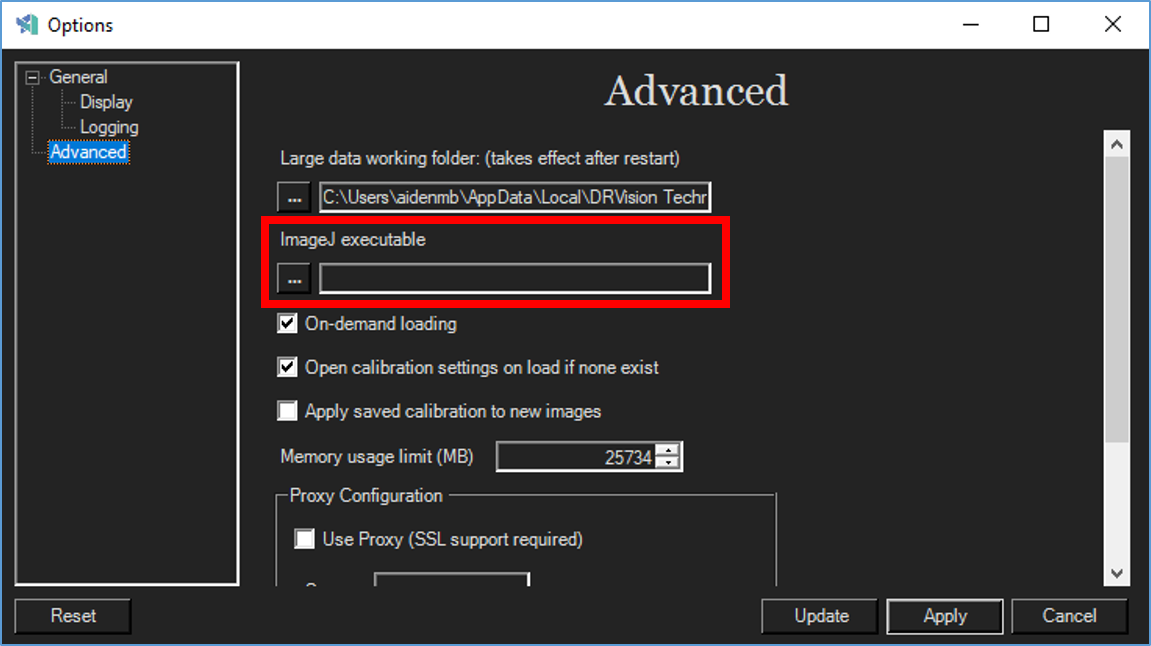
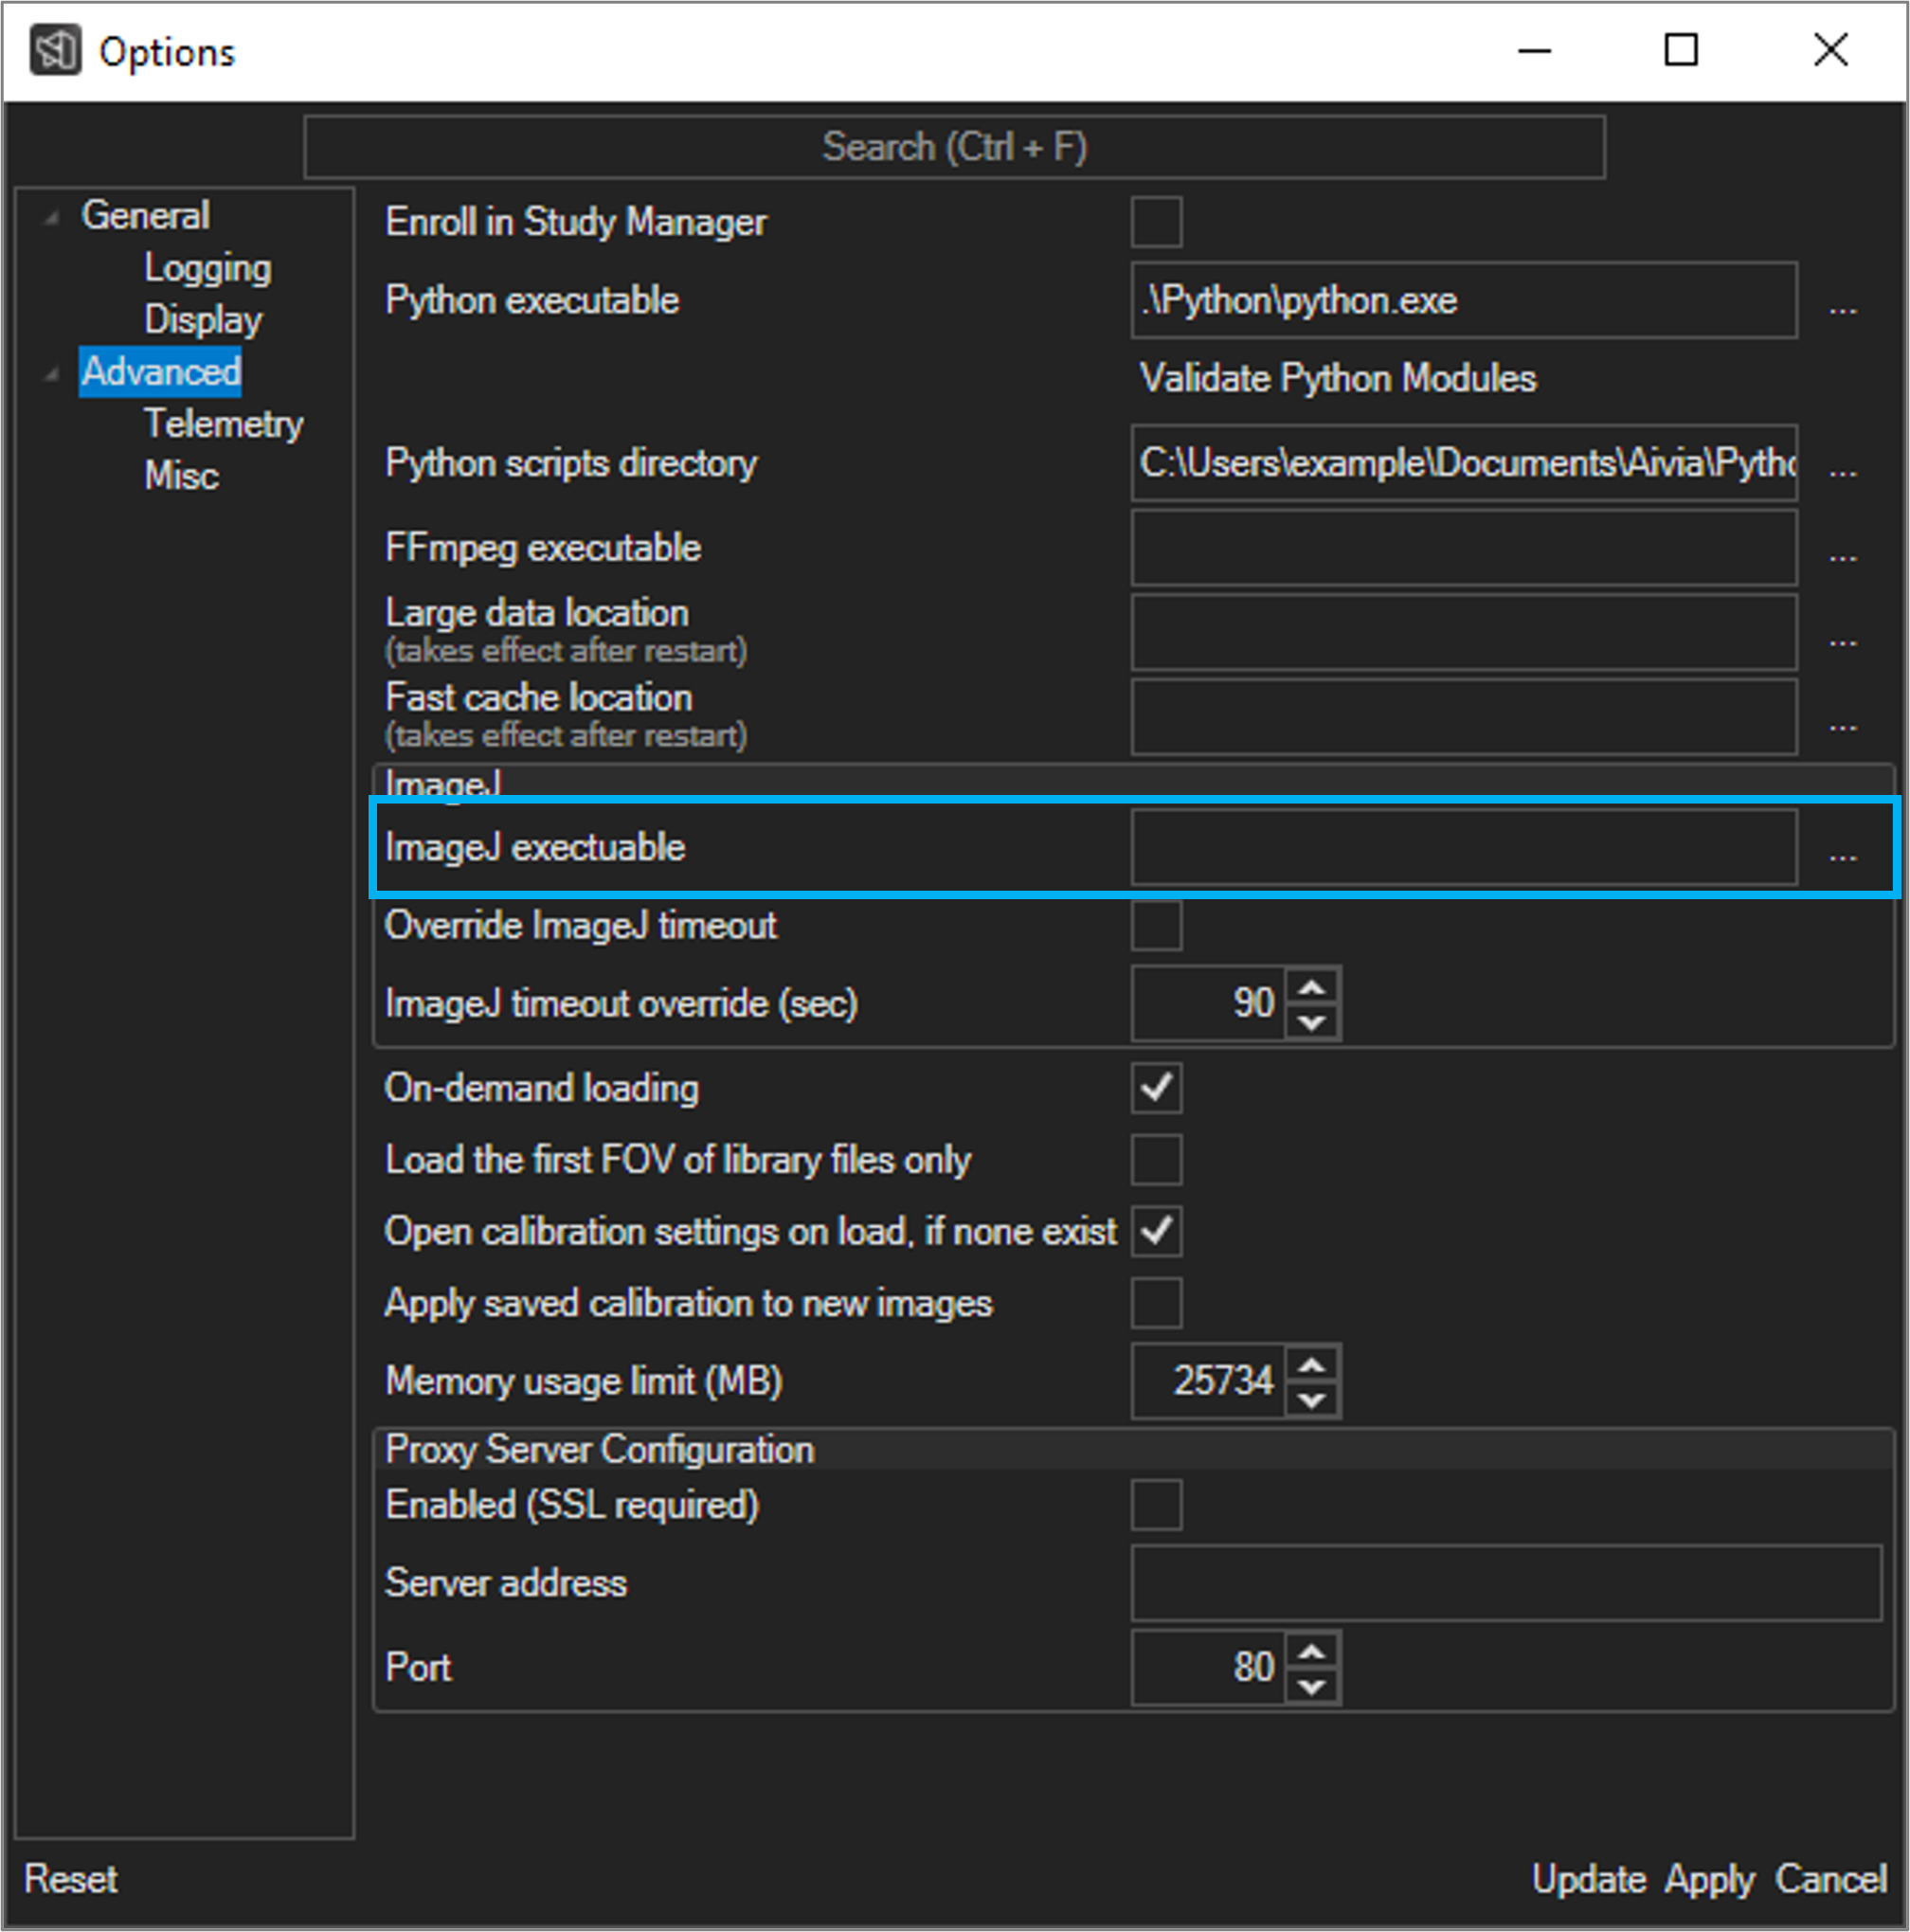
Aivia uses BioFormats from ImageJ/FIJI for file types that are not supported natively (see here for a list of supported file formats). Defining the location of your ImageJ/FIJI executable will allow allows Aivia to launch ImageJ/FIJI automatically when needed.
- Go to File > Options... to launch the Aivia options Options dialogGo to Advanced in the options dialog
- Click Advanced in the left section of the Options dialog.
- Click on the ... button to the left right of the directory path below ImageJ executablefield for the ImageJ Executable.
- In the pop-up dialog, navigate to the location of your ImageJ/FIJI program executable. If you have FIJI installed, the executable will typically be located in a folder called Fiji.app. For better performance, we recommend using a 64-bit installation of ImageJ/FIJI.
- Click Open to define the location of your ImageJ/FIJI installation.
- To update the settings, click Apply at the bottom of the options windowOptions window; you must restart Aivia for the settings to take effect.
| Info |
|---|
| After you modify the settings, make sure you restart Aivia in order for the new settings to take effect. |
| . |
Related articles
| Filter by label (Content by label) | ||||||||||||||||||
|---|---|---|---|---|---|---|---|---|---|---|---|---|---|---|---|---|---|---|
|
| Page Properties | ||
|---|---|---|
| ||
|
